

Overview
In this blog post, I will try to guide you on how to make the tags on the card components in your React app generate dynamically and display them. I used this for my own portfolio and ended up liking them a lot, I hope you will too.
Prerequisites: Abit of Javascript and React know-how and nothing more (well... some sprinkles of CSS skills are always nice.🎊)
(This guide will assume that you have a React-Create-App setup)
I hope you will find it useful 🖖
Structure
File Structure
//Project dir
├── package.json
├── package-lock.json
├── README.md
│   ├── src
│   │   ├── assets
│   │   │    ├── data
│   │   │    │    ├── DisplayData.js
│   │   ├── App.css
│   │   ├── components
│   │   │    ├── Display.js
│   │   │    ├── Display.css
│   │   │    ├── DisplayItem.js
│   │   │    ├── DisplayItem.css
│   │   ├── App.js
│   │   ├── App.css
│   │   ├── index.js
│   │   ├── index.css
│   │   └──  logo.svg
The Data
All the data is stored in a separate js file (called DisplayData.js).

I stored most of all the text and images that are displayed on the app as objects in this Data array. And all the cards are being looped out with the map array method in the Display Component (I'll show this a bit down in this guide)
The part we will be using in this guide is the property called tags. And will look something like this:
tags: ["React", "Redux", "React Router", "API"],
The Components
DisplayItem.js (first part)
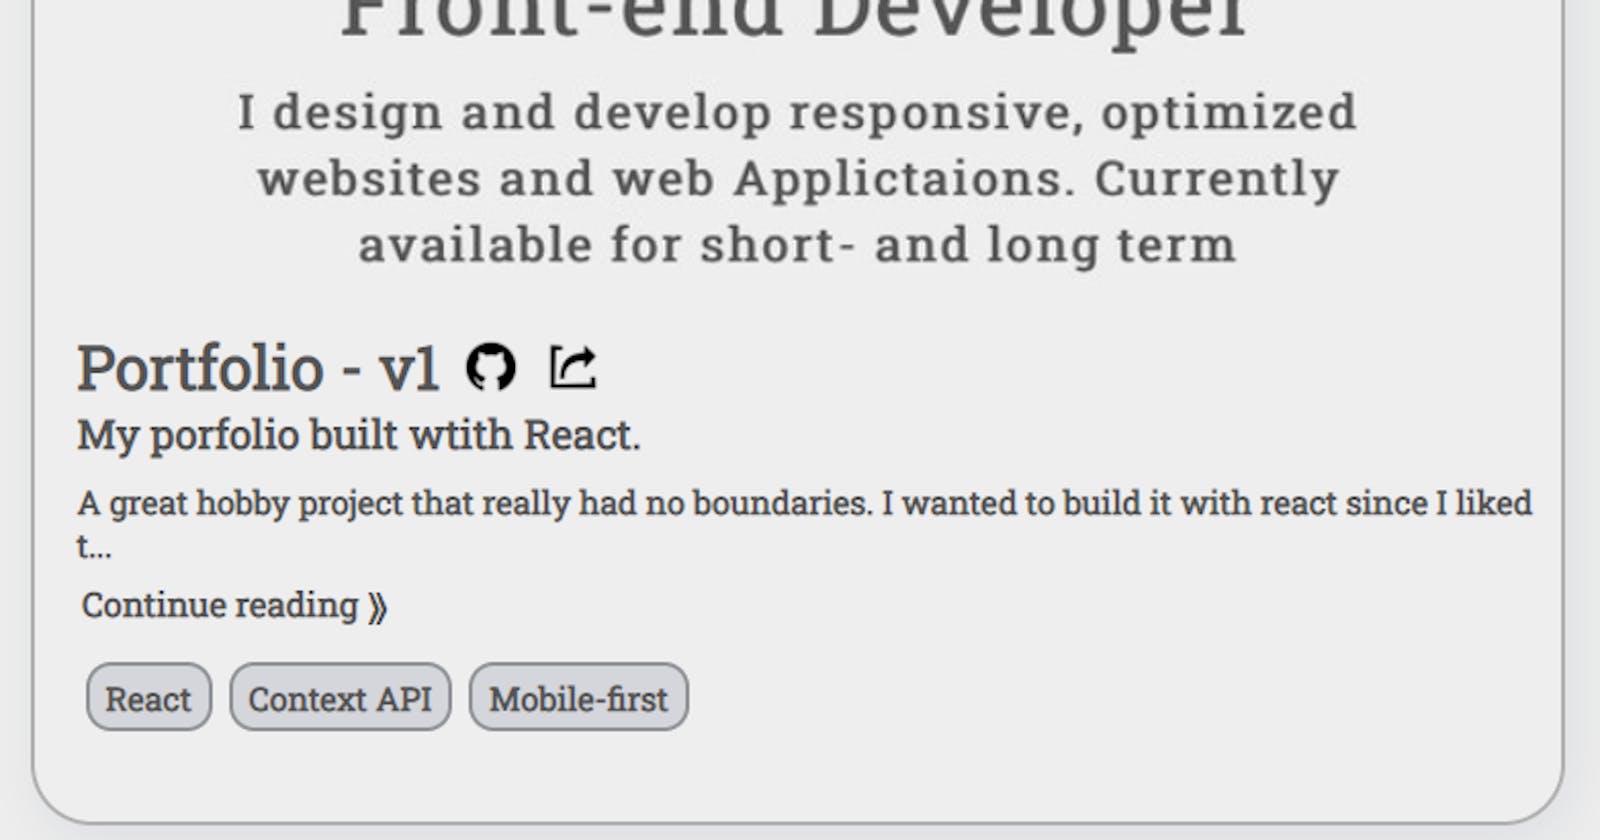
This is the component that we are most interested in, this is where the tags (and the whole card) will be defined.
The cards will map out all the data from DisplayData (shown on the image above) with a lot offs divs and h2, a, img, p and buttons. But we are most interested right now in the lower part of the functional component, with the className="tags":
function DisplayItem(props) {
  const tagItems = props.tags;
  return (
<div className="item">
...
<div className="tags"></div>

</div>
Inside the tags-div, the tags will be returned and rendered out, but let's take a step back and take a short peek at the parent component: Display.js (we will return to the tags in just a minute, promise!)
Display.js
Here is where the cards are created, and most of the magic is happening. The cards are like I said before mapped out and thanks to Props: the data stored in the array of objects of DisplayData.js will get passed down to each card.
The display component will return a div that will contain all the cards.
import Data from "../assets/data/DisplayData"; //This is the raw data
function Display() {

return (
<div className="display" id="work"></div>

}
Now we must address what the card will contain. Would be crazy to skip this step, right?
      <DisplayItem
        key={item.id}
        title={item.title}
        preamble={item.preamble}
        text={item.text}
        image={item.image}
        github={item.github}
        webpage={item.webpage}
        tags={item.tags}
      />
Did you see it? Right at the bottom is the prop with the tags. Wonderful!
Now the DisplayItem must be looped over and this is a great opportunity to use the map method.
const generateDisplayItem = Data.map((item) => {
    return (
      <DisplayItem
        key={item.id}
       ...
        tags={item.tags}
      />
    );
  });
And to finish it off we must add the generateDisplayItem function down in the return of the Display function:
function Display() {

return (
<div className="display" id="work">
{generateDisplayItem} //Here it is!
</div>

}
DisplayItem.js (second part)
We are almost there at the end, brace yourself!
All the data for the component is passed down as props and I found the best way for me was to store the specific tags to be stored in their variable:
const tagItems = props.tags;
And now its time to map over that variable and render it out as paragraph elements:
  const generateTags = tagItems.map((item) => {
    return <p>{item}</p>;
And that's it, the data is rendered out and you should have some tags printed out nicely on your card. You should celebrate!
Now... to the styling!
CSS
I ended up with something like this:
.tags p {
  font-size: 0.8rem;
  border: 2px solid rgb(146, 148, 151); // gray
  background-color: rgb(212, 214, 219); // light-gray
  text-align: center;
  border-radius: 10px;
  color: rgb(85, 85, 85); // almost black
  padding: 3px 6px;
  margin: 0.2rem;

}
And that's it, folks! Now you can display all the tags in the world!
Thank you for reading, and let's connect!
Thank you for reading my blog. Feel free to visit my portfolio and connect with me here on Hashnode or on Twitter (I need to follow some more nice people on Twitter...)